
Usually, the Custom Liquid section is available on your Shopify theme customization; however, if you cannot find it on the section list, you can follow the guide below to create Shopify Custom Liquid section for your theme.
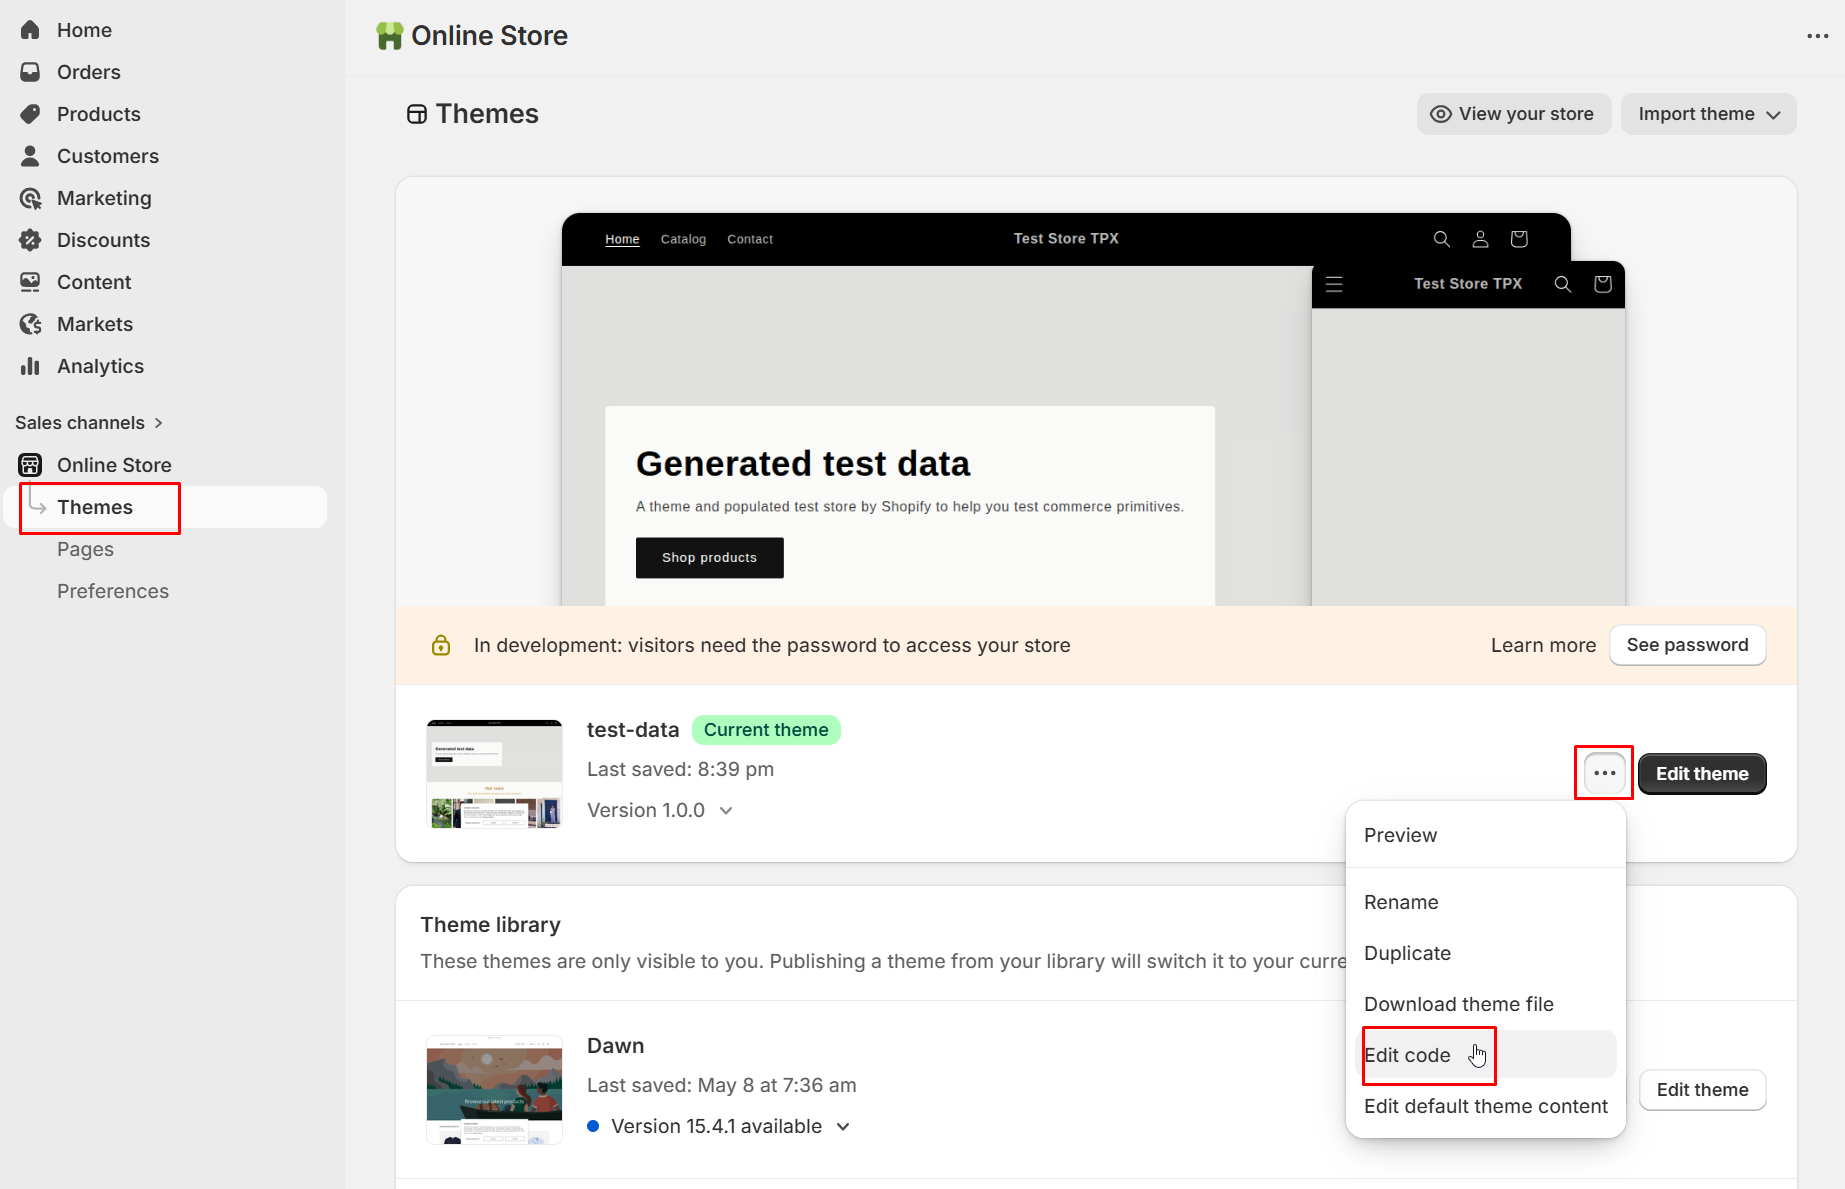
– In your Shopify admin panel, go to “Themes” below the “Online Store” section
– Click “Edit Code” in the dropdown menu next to the “Edit theme” button of the current theme
– Click Add a new section and give it the name “custom-liquid-section” in the sections directory.
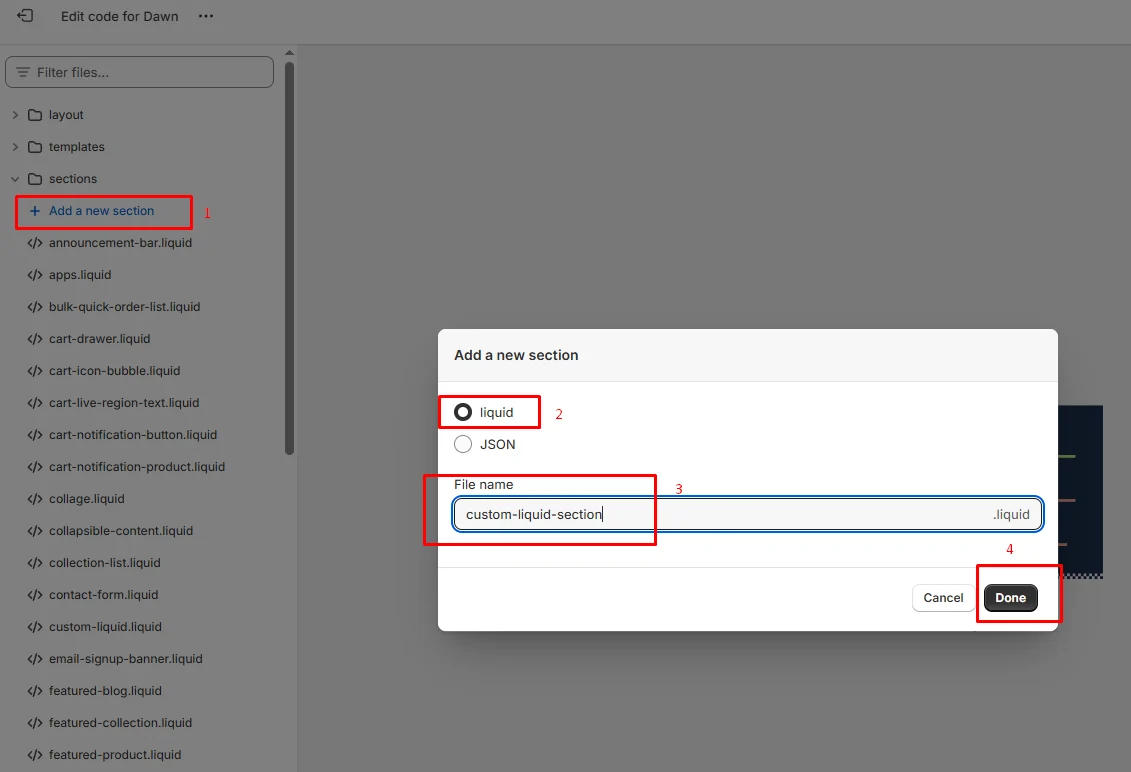
– Hit “Done”
(*)Note: If there is not option “Add a new section", after clicking to open the ‘sections’ folder, you can click on the ‘New File‘ icon" instead:
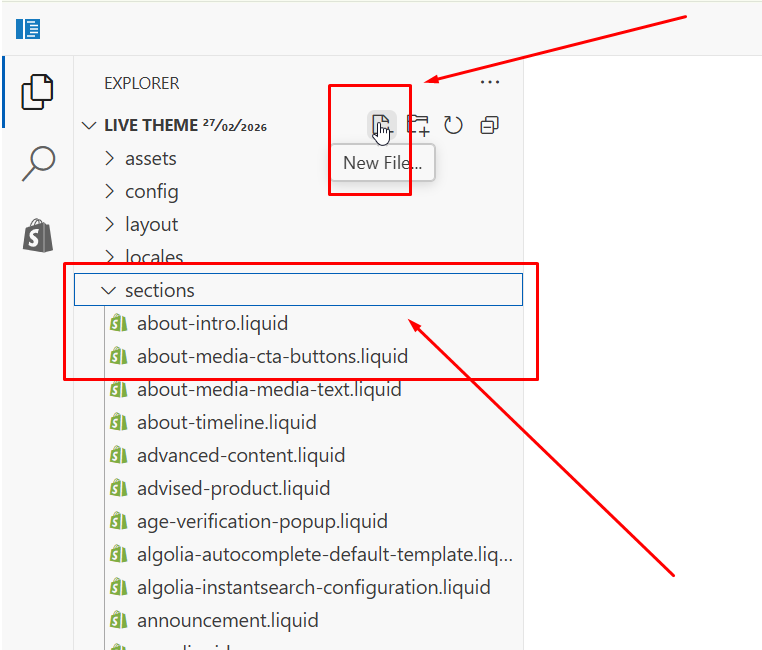
In this case, please do not forget the file extension. You must give new file the name “custom-liquid-section.liquid”.
– Add the code below to the section, and then choose “Save” on the right side.
{{ section.settings.custom_liquid }}
{% schema %}
{
   "name": "Custom Liquid",
   "settings": [
   {
      "type": "liquid",
      "id": "custom_liquid",
      "label": "Custom Liquid",
      "info": "Add app snippets or other liquid code to create advanced customizations."
   }],
   "presets": [
   {
      "name": "Custom Liquid"
   }]
}
{% endschema %}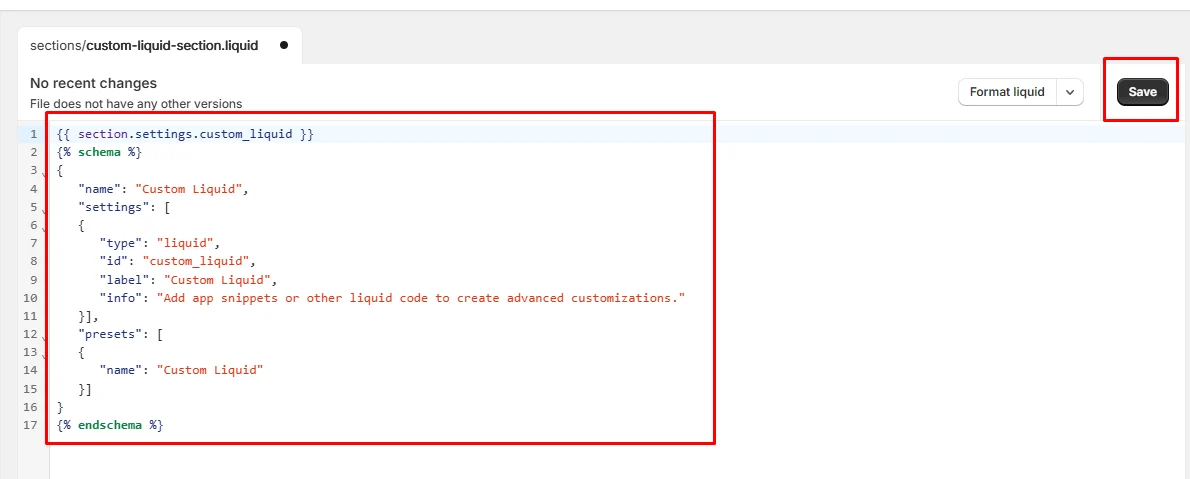
Now, the Custom Liquid section is available in your theme editor. Do step-by-step to add it to your Shopify theme.